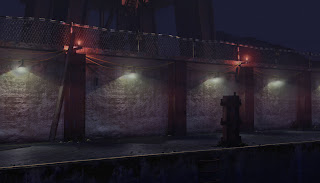
This was an exam scene i prepared for "Media-Design Hochschule". It was done for a lighting lecture of a gamedesign course.
The task was to set up a light rig (light rig = all lights that are used to light a scene) without advanced lighting solutions like radiosity or global illumination (bounced light) . Just fake GI by using spots and selective lighting, since the possibilities in game engines are mostly limited.
I wanted to teach the students how to use standart lights and teach them to get a feel how lights behave....think like a light :)
so i modeled this harbour scene and set up a light rig as an example and let the students do their own light rig in a test.
I used many different lights in the scene that all serve in different ways.
So these functions of lights are mostly the same for every scene you will ever light.
Download the german paper of this class
 Key lights: are the most bright lights in a scene. They define the dominant angles for shadows and illuminations.
 Bounce Lights: They act as the reflection of any lightsource inside the scene. usually, they consist of wide spotlights, with very small brightness and a desaturated color, of the surface from what it is reflecting of.
You want to use selective lighting. A selective light only includes selected objects within its illumination. Every 3d application is able to do this.
Advanced lighting techniques, like "Global Illumination" in Mental Ray, can compute the reflections of the lightrays, so that you do not have to create extra light sources, to fake the "GI"(global illumination)
 Fill Lights: illuminate the other direction of the key light, they help lighting the "not lit by keylight"-surfaces. It is also reduced in intensitiy/brightness and you can try the complementary color of the keylight for your fill light. Or blue or grey for outdoorscenes. Softer not so dark shadows.
 Rim Lights: define the outer shape of an object or a scene. Use a very bright light, perhaps cold colors and a light shadow
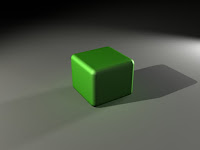 Final Image. To get a good feedback, of what your lights are doing, also always render them alone. Only then you can estimate the lighting effect.
When you render with all lights turned on you can see how the lights harmonize.
Here is the 3dsmax 2009 file of the cube with lights
------------------------------------------
And here the harbour scene in development.
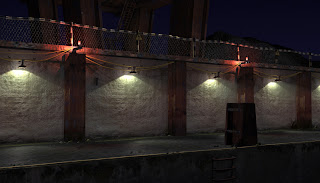 Here the first lighting attempt after modeling. Lightsources, that you can physically see in a scene are so called: Practical Lights. As you see there are plenty of them. In this first attempt i created not only the keylights, but also their bounce lights and rims on the railing. And also some local fill lights. but the scene totally lacks of an ambient fill, which should represent the color of the sky in this case.
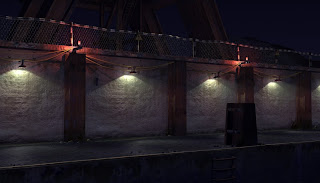 Here you see the ambient fill, which is blueish. The modeling was also somewhat cheesy, so i changed it.
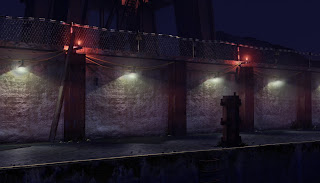 Here we see another change in geometry, and the adding of volume fogs to the practical key lights.
 And last but not least, a whole scene fog, just to add some harbour feeling. But that was photoshopping, because i was too tired ;)
If you want to see the rig, you can download the scene here.
(use right click "save as")
Download the german paper of this class
I hope this was interesting. cu l8er

No comments:
Post a Comment
Post your comment